How to Set Up a WordPress Site on DigitalOcean
DigitalOcean can be a little tricky when it comes to installing and setting up a WordPress site. But here's how you can do so seamlessly and easily.
Get a Free Marketing Analysis and Consultation
Nowspeed can review your Website, SEO, PPC, Email or Social Media Campaigns and identify ways to make an immediate impact!
Nowadays, we build our websites mostly using WordPress. It’s a clean, flexible content management system that fits most people’s needs perfectly. It allows our customers to manage their content with ease, and allows them to have their in-house team or other developers to run the entirety of the site after development is done.
We also really, really like DigitalOcean and their servers (note: we have not been paid or even in contact with DigitalOcean for the sake of the article, we just really like their servers). For a reasonable price, you can get yourself a VPS (Virtual Private Server) – which is far superior to shared hosting for a number of reasons – and set up and manage your site with as much or as little involvement as you’d like. The biggest complaint we see, though, is that it’s not easy to manage your own server and WordPress doesn’t seem to work very well out of the gate with their setup.
But – and this is true, we swear! – it’s easily remedied with a few steps, as shown below. So if you’d like to setup and manage your own self-hosted WordPress site, follow this guide and you’ll be in good shape! This guide is for more experienced users, so if you’re intimidated by a little code typing or server management, we recommend you find yourself a great local web developer who can help you out.
1- Use DigitalOcean’s 1-Click Install
DigitalOcean makes it pretty easy to initially install WordPress onto a VPS. In fact, they have a pretty easy–to–follow guide on their own website which you can read here. It’s a good starting point that we don’t need to rehash. A few notes, though:
Make sure to pick a server size for what your site will be in the future, not what it is now. I always recommend the $10 a month package to begin with at the very minimum. You want to have enough space and RAM to run your site when you start getting thousands of visitors, and upgrading your server means a complete site move, so it’s not the easiest process. Go ahead and splurge on the extra $5 a month if you plan on having any kind of traffic to your site. If it’s a personal hobby or blog site, the $5 plan should be fine.
Also, choose the server closest to your location. There’s possibly some stock in server location when it comes to SEO, and having a closer server will give you the best performance on the user’s end (though internet speeds mostly make this point moot nowadays).
Go ahead and enable backups, as you want to be able to restore your site if it’s ever hacked (or if you break it). Not having backups is a recipe for a migraine headache in the near future.
Select a hostname, which can be anything you want. If you’re running an email server, make sure to use your primary domain as the hostname (also known as your FQDN – Fully Qualified Domain Name). Once you have all those settings done, select “applications -> WordPress on 14.04” and go! Your server is now being created, and you’ll get an email when it’s ready with your login information.
2- The First Time Logging Into Your Server
Once you set up your server, you’ll get an email with the root password – this is the initial password you use to access your server, but you can’t use it for anything other than logging into the console. What’s the console, you ask? It’s the virtual window that DigitalOcean provides for you to log in to your computer as if you were physically typing on the keyboard in front of it. It looks something like this:
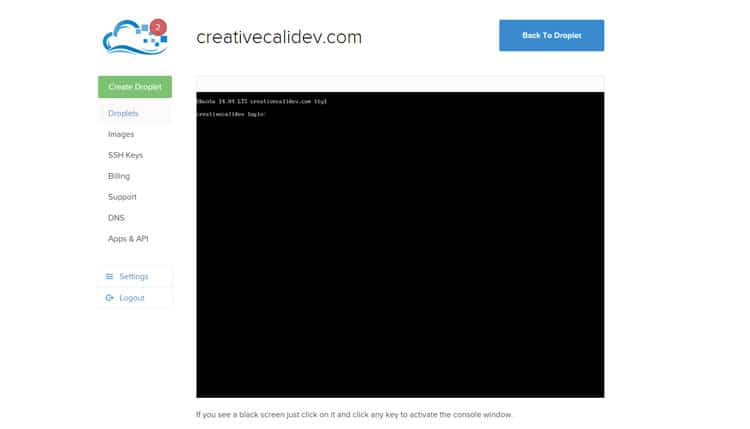
Your login name will be “root” and your password will be the password they emailed to you. Once you log in, it will ask you to immediately change your password – go ahead and select a new one that is pretty secure and you won’t lose or forget. Please do not make it “123456” or something easily guessed by a robot. This is the key to your server – if someone gets a hold of it, they can control everything on your website.
If you try to access your server via SSH (we recommend WinSCP for this) before changing the password, you’ll get a login error. I’ve banged my head against the wall more than once trying to log in to a new server after forgetting this fact.
3- Updating Your Server
Next up is to update all of the software on the server. While DigitalOcean gives you a fresh install of Ubuntu and an Apache server, they still don’t update it every time any application requires an update – this would require a new install image every few hours. So they leave it up to you. Once you’re in the virtual console, performing an update is pretty easy. All you do is type the following commands and then hit “enter.”
apt-get update – This command downloads all of the update files for your various programs onto the server. It does not actually install the software – for that, you need the next command:
apt-get dist-upgrade – You could just use the simpler command app-get upgrade, which will apply all the updates for your current packages that you just downloaded. But this version of the command, with that extra dist- added on, will also delete obsolete files or add new ones, functions the basic version of the command doesn’t do.
4- Adding Other Necessary Features
Once you execute those commands, it’s time to install the missing files that you need to properly run WordPress. While you can run a WordPress site on your site now, you will still run across plugins that don’t seem to work properly, or issues with your database running out of space. This is solved by installing the following:
5- SendMail
Your website won’t be able to properly send outgoing emails without this installed. This isn’t the same as setting up an email server. This plugin allows the generation of emails to be sent from your site, like when someone submits a form, for instance. You need to install and then activate SendMail doing the following:
apt-get install sendmail – Make sure to press “Y” when prompted. This will install SendMail. But it’s not ready yet.
To get your outgoing mail formatted properly so other servers don’t identify it as spam, you need to edit your host file to include your hostname:
- It’s found on your server in the main folder called /etc/ – and it’s then a file named hosts.
- You can edit the file by downloading it and opening it with WordPad, or editing it directly in the console (that’s for a whole other tutorial – search “edit files in ubuntu with command line” if you need help).
- Edit the first line from “127.0.0.1 localhost” to “127.0.0.1 localhost localhost.localdomain YOURHOSTNAME” using the hostname you selected when you first created your server.
- Save the file – if using WinSCP, just upload it over the old version – that should do the trick!
sendmailconfig – After editing the host file, you’re ready to configure SendMail. Execute this command and press “Y” when prompted.
Once you do those, your site should send outgoing email with no problem!
6- PHP5 Curl
Some plugins require CURL to work properly. I’ve run into this when trying to get plugins like social streams that require integration with APIs to work. Installing it is easy and will save you a number of future headaches.
apt-get install php5-curl – Done and done. If you do this at a separate time from this initial setup, make sure to restart your Apache server using the command service apache2 restart in the terminal.
7- SWAP File
A common issue that WordPress users have is the dreaded “error establishing a database connection” error that breaks a website. This is almost always due to your memory being completely used up – your database can’t create any new information because your RAM is jam-packed full. There are two reasons for this:
- You have a bajillion different versions of your posts (by default, WordPress saves all older revisions of pages and posts so you can recover previous copies).
- You didn’t have enough memory for your usage to begin with.
If it’s the former, we suggest you download a plugin like Better Delete Revision – this will clean up all the old copies and free up some database memory. If it’s the latter, and in the case of setting up a new server on DigitalOcean, you need to create a swap file. It’s a bit more complicated, so luckily, DigitalOcean has their own handy guide on how to create permanent swap memory in Ubuntu. This creates a file that, yes, swaps in and out as memory gets full, allowing for reallocation of files to keep your memory clear.
8- PHP Upload Maximum Size
This is a quick item that may or may not affect you. Sometimes, if you try to manually upload a plugin, you run into an issue where your PHP settings don’t allow a file of that size to be uploaded. To increase the max size, you need to:
- Find the file php.ini in the folder /etc/php5/apache2/
- Edit the line “upload_max_filesize = 2M” found under the “File Uploads” section to whatever size you need. I usually set it to 5M (five megabytes)
- Save the file and rewrite the old version
If you do this step at a time other than the initial server setup, make sure to restart Apache for it to take affect, using the command service apache2 restart in the terminal.
You’re Done Setting Up Your DigitalOcean WordPress Server!
All that is left to do now is to restart the whole darn server. Go ahead and do this using the “Power Cycle” button in your DigitalOcean dashboard. From here, you can proceed with setting up WordPress using the rest of the instructions in DigitalOcean’s guide, and you’ll be well on your way to creating and hosting your own WordPress site on a VPS.
While this guide was a bit lengthy, it covers all of the necessary settings and plugins you need to have to run a successful WordPress installation using DigitalOcean. If you have any questions, let us know!
So let's
talk.
We're always excited to dig into the details of your company and what strategy can help you meet your goals. So let's talk and lay out a plan for success!